
About the author
Published December 12, 2025 · Last reviewed April 26, 2026 · 17 min read
In this article · 6 sections
Coloring in a coloring book is a simple, mindful practice. It's really just about three things: finding a calm space, grabbing your tools, and putting color on paper without any pressure. The whole point is to ditch perfectionism and just enjoy the creative flow as a way to relax, especially when you have a book designed for it, like the Mono Moment monochrome coloring book.
Your Path to Mindful Coloring Starts Here
Staring at a blank coloring page can feel surprisingly intimidating, can't it? Especially when all you want is a little peace and quiet. Think of this guide as your permission slip to let go of "getting it right" and simply enjoy the process. Coloring has come a long way from a kid's pastime; it's now a powerful way for adults to practice mindfulness and find a quiet escape from the noise of daily life.
This journey doesn’t start with complicated art theory. It starts with getting comfortable.
The adult coloring trend isn't just a fad, either. When Scottish artist Johanna Basford released 'Secret Garden' back in 2013, it sold over 2 million copies by 2016 and kicked off a global movement. It's no surprise why. Studies have shown that adults who color for just 20 minutes a day report feeling significantly less anxious.
Setting Up Your Creative Space
The right setup can turn a simple activity into a restorative ritual. And no, you don't need a dedicated art studio—a quiet corner of your kitchen table will do just fine. The real magic is in the intention. By setting aside a specific place and time, you're telling your brain it's time to switch gears, unwind, and focus.
This simple approach breaks it down into three core elements.
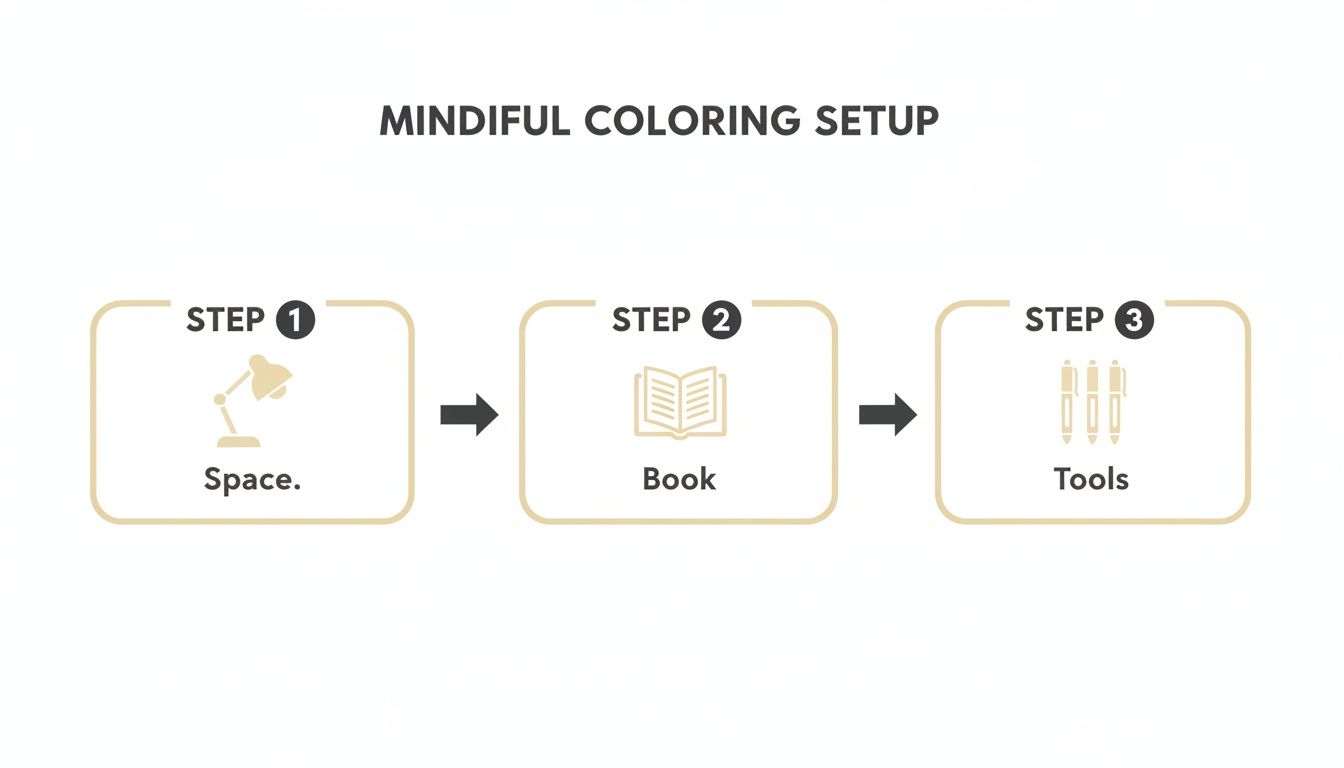
As you can see, a great session just needs a dedicated space, your book, and your favorite tools. Keeping it simple makes the whole process feel approachable instead of overwhelming.
The goal is to create a small pocket of time—just 15 to 30 minutes—that feels like a genuine escape. It's about building a consistent habit of self-care, not producing a flawless masterpiece.
This is where having the right tools can make all the difference. For instance, the Mono Moment monochrome coloring book is designed to eliminate decision fatigue completely. By taking the pressure of choosing colors off the table, it lets you dive straight into the soothing motion of coloring. You can learn more about how mindfulness coloring books for adults can support your mental well-being. This approach helps you focus on the calming repetition of strokes and shading, making your creative time truly stress-free from the very start.
Here's a quick checklist to get you started in just a few minutes.
Your 15-Minute Mindful Coloring Setup
| Element | Why It Matters | Quick Tip |
|---|---|---|
| A Quiet Spot | Minimizes distractions and signals to your brain that it's "focus time." | Find a corner away from high-traffic areas. Even a comfy chair works. |
| Good Lighting | Prevents eye strain and helps you see the true tones of your colors. | A simple desk lamp or a spot near a window is perfect. |
| Your Coloring Book | The centerpiece of your session. | Open your Mono Moment coloring book to a page that inspires you, not one that feels overwhelming. |
| Your Tools | Having pens or markers ready removes friction. | Lay out your three-brush pen set or a few favorite markers. |
| A Timer | Sets a clear boundary for your session, preventing it from feeling like a chore. | Set a timer for 15 minutes on your phone (and put it on Do Not Disturb!). |
Setting up shouldn't be a big production. The idea is to make it so easy to start that you have no excuse not to give yourself that small break. A few intentional choices can turn a brief coloring session into a truly refreshing experience.
Choosing Your Tools and Making That First Mark
The right tools can feel like a secret weapon, but you absolutely don't need a huge art supply haul to get started. The real goal is to find what feels good in your hand and lets you get creative without a big fuss. Let's break down the options so you can pick your tools and start coloring with confidence.
Lots of us start with colored pencils because they feel safe and controllable. Others jump right in with markers for that bold, satisfying color coverage. But both can be a bit tricky. Pencils need constant sharpening and can make your hand cramp after a while, and we've all felt the pain of markers bleeding straight through the page.
That's a big reason why tools like brush pens have become a favorite. The three-brush pen set from our store gives you the best of both worlds—you get the fine point for details and the broad, brush-like side for filling in bigger spots.
Curate Your Collection for Simplicity
Instead of getting paralyzed by a giant, 100-piece set of colors, think smaller. A curated collection isn't about limiting yourself; it's about freeing yourself from decision fatigue. Our three-brush pen set, for example, was designed to give you a gorgeous range of gray tones for shading and depth without needing a dozen different tools.
When you work with a limited palette, you actually push your creativity further. This is especially true with the Mono Moment coloring book. The artwork is intentionally designed to look stunning with just a few tones, letting you sink into the simple, meditative act of coloring. You’ll be amazed at how sophisticated your work can look without a whole rainbow of colors. Of course, the right paper makes a huge difference, which is why we’re big believers in coloring books with thick paper that can handle whatever you throw at it.
Your First Confident Marks
Alright, let's get that pen to the page. How you hold your tool is everything. So many of us start out with a death grip, which leads to stiff, awkward lines and a hand that’s sore after five minutes.
Try this instead. It’s a simple shift that changes everything:
- For Details: Choke up on the pen, holding it closer to the tip. This gives you tons of control for getting into tight corners and making those edges super crisp.
- For Large Areas: Loosen up! Hold the pen further back from the tip. This naturally encourages a more relaxed, sweeping motion that’s perfect for filling in big spaces without straining your hand.
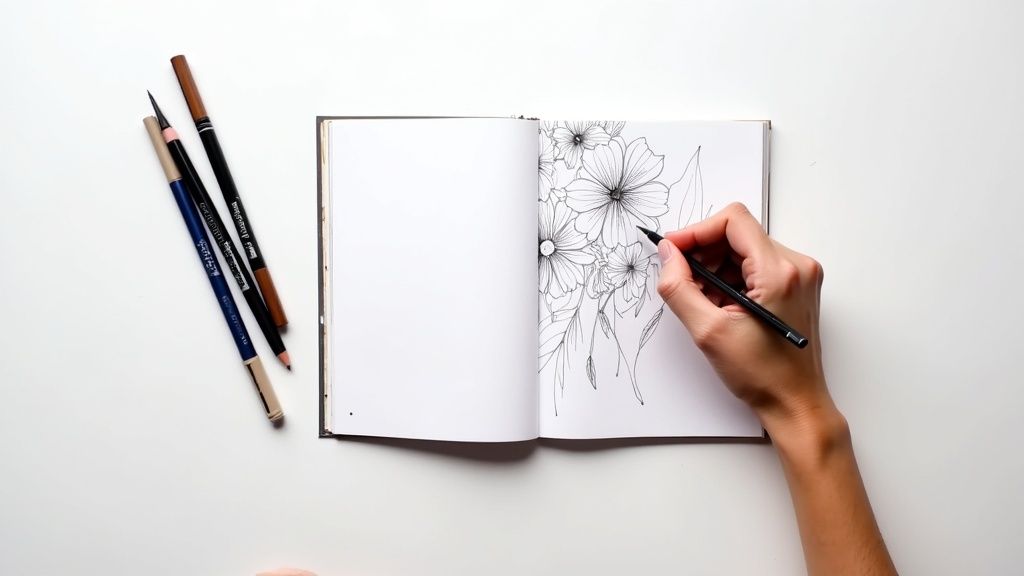
That blank page isn't a test; it's a playground. Before you even touch a main illustration, find a spare page in your Mono Moment coloring book and just mess around. Don't try to color anything specific. Just make marks.
Play around to see what your tools can do. What happens when you press lightly with a brush pen versus firmly? What kind of texture can you get with little dots or short dashes?
- Smooth Strokes: Practice some long, even strokes. Just try to keep the pressure consistent.
- Playful Dots (Stippling): Use the very tip of your pen to create cool textures with tiny dots. The more dots, the darker the area.
- Hatching & Cross-Hatching: Draw lines all going in one direction (hatching), then draw more lines going across them (cross-hacking) to build up shading.
This isn't about being "good" at it. It's about getting familiar with your tools. The more comfortable you are just making simple marks, the more confident you'll feel when you start your first real design. It’s all about building a little muscle memory and making the whole experience feel easy from that very first mark.
Bringing Your Pages to Life with Simple Techniques
Ready to move beyond coloring with flat, single tones? This is where the real fun begins. It's the moment you start adding depth, dimension, and a little bit of your own magic to the page.
Don't worry, you don't need a degree in art theory. We're going to walk through a few foundational techniques that are incredibly simple to pick up but make a massive difference in how your finished piece looks and feels. Think of it like learning to cook—once you know a few basics, a whole world of recipes opens up. The same is true here.
Layering Colors for Richness and Depth
The secret to rich, complex color isn't pressing down harder. It's layering. Instead of one heavy-handed coat, you apply multiple light coats on top of each other. This simple shift gives you incredible control and builds up deep, vibrant tones you just can't get in a single pass.
My advice? Always start with your lightest color. Lay down a gentle, even layer across the whole area you're working on. Then, grab a slightly darker shade and go back over the parts you want to appear shadowed or further back. With each new layer, you'll see the color deepen and take on a new life.
This is where good paper really shines. The 160gsm paper in the Mono Moment coloring book was chosen specifically for this. It’s thick and smooth, so it can handle multiple layers without tearing or letting the ink bleed through to the other side.
Blending for Seamless Gradients
Blending is what makes a sunset look like a real sunset, not just stripes of color next to each other. It’s how you create those beautiful, smooth transitions from one shade to another. With our three-brush pen set, this technique feels surprisingly natural.
Here’s a quick exercise to get the hang of it:
- Pick an area and color about two-thirds of it with your lightest gray brush pen.
- While that ink is still a little damp, take your medium gray and start coloring from the opposite end, overlapping the two colors in the middle.
- Now for the magic. Go back over that overlapping section with your lightest pen. The alcohol ink will reactivate, and you'll see the colors melt together into a perfect gradient.
It's a fantastic skill to build, especially for monochrome art. To see just how powerful these tones can be, check out our guide on grayscale coloring books.
Pro Tip: Don’t feel like you have to color every single speck of the page. Leaving some white space—also known as negative space—can act as a natural highlight. It makes your colored areas pop and gives the whole piece room to breathe.
Creating Simple Textures
Want to make a surface look like it has a real-world feel? Texture is the answer, and you don't need any special tools—just the pens you already have.
- Stippling: Use the fine tip of your pen to create a pattern of tiny dots. Bunch them close together for darker areas and spread them out for lighter ones. It's perfect for creating a sandy or grainy look.
- Hatching: This is just drawing a series of parallel lines. You can change the direction of your lines to follow the contours of an object, giving it an immediate sense of form and shape.
Even professional artists rely on layering to get solid color without a muddy mess. In fact, studies show that just four light passes can create 92% opacity—perfect for coloring books. Plus, using a dual grip (loose for big areas, tight for details) has been shown to reduce hand fatigue by 50% during those longer, more relaxing sessions. You can find even more practical tips by exploring what works for others in the community.
Embracing the Art of a Limited Palette
Let's debunk a huge myth right now: you don't need a massive box of crayons to create something beautiful. In fact, staring at a rainbow of 120 pencils can be completely overwhelming, leading to what I call "color paralysis." What if the real secret to unlocking your focus and creating stunning art wasn't more color, but less?
Working with a limited palette is one of the most freeing things you can do. It strips away the pressure to find the "perfect" color combination and lets you zero in on what truly makes art come alive: light, shadow, and texture. This is the entire philosophy behind our Mono Moment coloring book.
This approach proves that monochrome isn't a limitation—it's a superpower. When you're working with just shades of gray, black, and white, you start to see illustrations in a totally new way. It sharpens your artistic eye and quiets that nagging anxiety that a blank, colorful page can sometimes trigger.
Unlocking Depth with Value
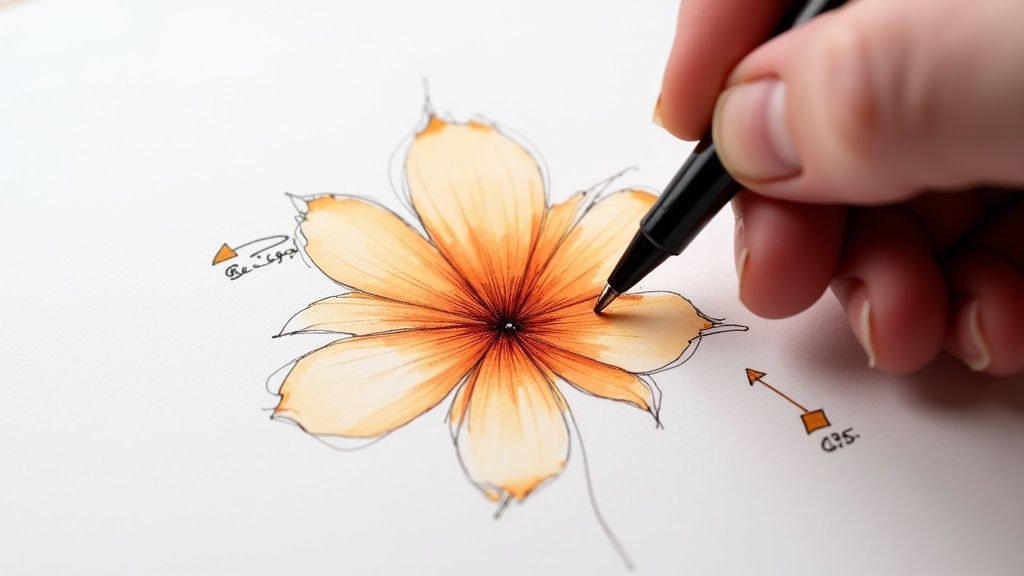
So, how do you make a picture pop using just a few tones? It all comes down to understanding value. Simply put, value is just the lightness or darkness of a tone. By playing with different values, you can create incredible contrast, set a specific mood, and even achieve a surprising sense of realism.
Picture a flower petal. Instead of getting stuck on which shade of pink to use, you only have to ask yourself: which part is catching the light, and which part is in shadow? You can grab the darkest gray from our three-brush pen set for the deepest shadows and let the crisp white of the paper serve as your brightest highlight.
Working in monochrome trains your eye to see the world in terms of light and form. It’s a skill that will make all of your future coloring, no matter the palette, feel more dynamic and intentional.
Suddenly, you're not just filling in shapes anymore. You're sculpting them with light and shadow, adding real dimension and bringing the illustration to life through contrast.
When you're limited to just a few shades, mastering different techniques to create dimension is key. You can't rely on color to do the heavy lifting, so you learn to build depth through value and texture instead.
Creating Depth in Monochrome
| Technique | How It Works | Best For |
|---|---|---|
| Layering | Applying the same light gray tone multiple times to slowly build up darker areas. | Creating soft, gradual shadows and smooth transitions. Think rounded objects like a vase or a piece of fruit. |
| Hatching & Cross-Hatching | Drawing parallel lines (hatching) or overlapping lines (cross-hatching) to create shadow. The closer the lines, the darker the value. | Adding a sense of form and texture to objects like clothing, wood grain, or architectural elements. |
| Stippling | Using tiny dots to build up tone. The denser the dots, the darker the shadow. | Achieving delicate textures and subtle shading, perfect for botanical drawings or portraits. |
| Using Negative Space | Intentionally leaving the white of the page untouched to act as the brightest highlights. | Making focal points pop and creating a strong sense of light. It's essential for high-contrast images. |
This isn't just about making things look good; it's about learning a new visual language. Each mark becomes more deliberate and impactful.
Creative Prompts for Monochrome Art
Ready to dive into your Mono Moment coloring book? Instead of just coloring within the lines, try one of these simple prompts to guide your session and stretch your creative muscles.
- Texture Over Tone: Pick one small section and focus only on creating texture. Use stippling (dots) or cross-hatching (crisscrossing lines) with a single pen to build up shadows instead of reaching for a darker color.
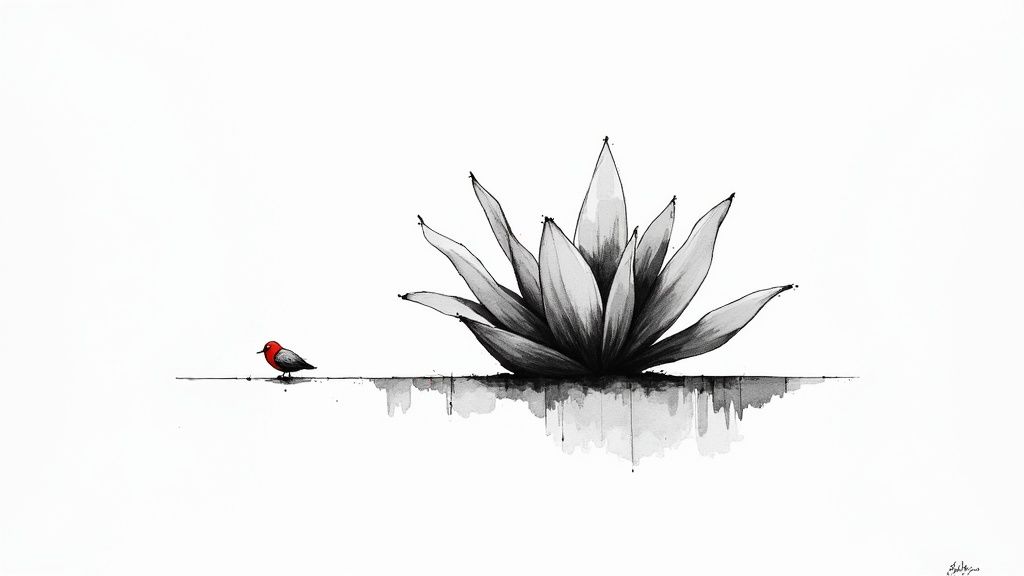
- The Single Accent: Color an entire page using only shades of gray. Once you're completely done, go back and add one tiny, strategic pop of a bright color—like the red on a bird's chest or the yellow center of a flower—for a huge dramatic impact.
These little exercises help shift your mindset from "what color should I use?" to "how can I make this more interesting?" It turns a simple activity into a mindful practice of observation and creativity, making every 15-minute session a rewarding artistic escape.
Working Through Those Annoying Coloring Frustrations
Let's be real—even the most relaxing hobby can have moments that make you want to throw your tools across the room. You sit down to unwind, and suddenly you’re staring at a marker bleed that’s ruined the back of a page. Or maybe you're just completely frozen, unable to pick a single color.
This is all part of the process, I promise. Every artist I know, myself included, runs into these little snags. The secret isn't about achieving flawless perfection; it's about having a few tricks up your sleeve to navigate the bumps so you can get back to the good stuff.
Taming Your Tools and Paper
First, let's tackle the physical stuff—the tangible issues that can really throw a wrench in your creative flow.
Marker bleed-through is probably the number one offender. It happens when ink soaks right through the paper, and it's exactly why paper quality matters so much. This is where a book with thick, 160gsm paper, like the Mono Moment coloring book, becomes your best friend. That dense paper is specifically chosen to stand up to ink and keep it on one side of the page.
Smudging is another classic, especially for my fellow lefties out there. The fix is wonderfully simple: just slide a spare piece of paper under your coloring hand. It acts as a guard, letting your hand glide over the page without smearing all your hard work.
Here’s a pro tip I swear by: Use a scrap page or the inside cover of your book as a swatch sheet. Test your colors there first. Seeing how they actually look on the paper before you commit can save you a world of regret. It takes five seconds and makes all the difference.
You might also notice the paper buckling or warping if you lay down too much ink. To prevent this, aim to keep your ink coverage to about 80% per page. When you're filling large areas, use gentle, circular motions and work from the outer edges inward. This little technique gives you a much smoother, more even fill and can improve consistency by up to 40%. If you're curious about the nitty-gritty, you can find more insights into the coloring book market and how paper quality directly impacts how much people enjoy their books.
Getting Out of Your Own Head
More often than not, the real roadblocks are mental. It's that nagging fear of "ruining" a beautiful page or the anxiety of picking the "wrong" color that stops us in our tracks. This is precisely where something like the Mono Moment monochrome coloring book can be a game-changer. By taking the infinite universe of color choices off the table, it helps quiet that inner critic and lets you simply enjoy the meditative act of shading and filling space.
When you do feel that paralysis creeping in, try one of these gentle mental shifts:
- See the human touch. A tiny smudge or a line that isn't perfectly contained isn't a mistake—it's evidence that a real person was here, creating something. Reframe it as part of your unique artwork.
- Use a choice timer. If you're agonizing over colors, give yourself just 30 seconds to pick a few and go with them. Putting a time limit on the decision short-circuits the overthinking part of your brain.
- Lean into "good enough." Remember why you started: to relax. A page that is simply done and gave you 15 minutes of peace is a huge win. That's the whole point.
Ultimately, navigating these little frustrations is just an exercise in being kinder to yourself. Each page is a fresh start—a chance to practice, not to perform.
Your Coloring Questions, Answered
As you get started, you're bound to have some questions. It happens to everyone! Think of me as a friend who’s been down this path before. I want to help you tackle those common little worries that can pop up, from picking the right tools to telling that inner critic to take a hike.
Let's clear the air and get you coloring with nothing but confidence and excitement. Here are the questions I hear the most from people just like you.
What Are the Best Tools if I’m on a Tight Budget?
You absolutely don’t need to break the bank to get started. Honestly, a simple, high-quality set of colored pencils is one of the most affordable and versatile ways to begin. My advice? Look for a brand known for rich color, even if that means starting with a smaller set of essential shades.
Another great route is a specially curated collection. Our three-brush pen set, for example, was designed to give you a ton of blending and shading power with just a few tools, making it an incredible value. The golden rule is always quality over quantity. A few great pens or pencils will serve you far better than a hundred mediocre ones that just leave you feeling frustrated.
How Do I Pick Colors Without Feeling Completely Overwhelmed?
Ah, the classic question! This is easily the most common hurdle for beginners and even experienced colorists. The best trick I've found is to intentionally limit your options. Seriously, just try picking three or four colors you love together and commit to using only those on an entire page.
This is the whole idea behind our Mono Moment monochrome coloring book. It’s designed to completely remove the pressure of choosing colors. This frees you up to focus on what's really satisfying: the process of shading, creating texture, and watching an image come to life. It's a fantastic way to learn the ropes without the usual color anxiety.
A limited palette isn't a restriction; it's a creative playground. It forces you to get inventive with shading and texture, which are the foundational skills you’ll use forever.
My Hand Starts to Cramp After a While. What Can I Do?
Hand fatigue is totally normal, especially when you're just getting into the groove of a new creative habit. First thing to check is your grip. So many of us hold our pens in a death grip without even realizing it! Try to consciously loosen up your hand.
Simple pencil grips can be a lifesaver, and using pens with thicker, more ergonomic barrels also makes a huge difference. Most importantly, take breaks! Color for 15-20 minutes, then get up, stretch your hands and shoulders, and give yourself a moment. This is supposed to be relaxing, not a source of pain.
Can I Use Different Kinds of Pens and Pencils in the Same Book?
Yes, and you absolutely should! Artists call this "mixed media," and it's a brilliant way to add depth, interest, and unique textures to your pages. The only catch? It all comes down to your paper quality.
On thick, sturdy paper—like the 160gsm stock we use in every Mono Moment book—you can confidently mix and match your tools. For example, you could lay down a smooth base layer with a brush pen and then come back in with colored pencils to add fine details and shading. Just do a little test patch on a spare page first to see how your tools play together.
Ready to put this advice into action and find a creative outlet that’s genuinely stress-free? The Mono Moment monochrome coloring book is built from the ground up to help you skip the decision fatigue and dive straight into a state of mindful flow.
Explore the Mono Moment Coloring Book and start your journey today at mono-moment.com

The Monochrome Coloring Book
A single-pen, decision-free coloring book on 160 gsm cream paper — engineered for the wind-down ritual described above.


0 comments